Block Editor
All of the information below requires some knowledge of how to use WordPress’ Gutenberg block editor. If you do not know how to use that already, see this helpful article below:
Blocks can be added in any page or post. To add a new block in the editor, simply click into the content and press “Enter” on your keyboard, creating a new line. The “+” icon should come up, which you can click and choose a new block. You can also optionally start typing and it will by default add your typed text into a paragraph block.
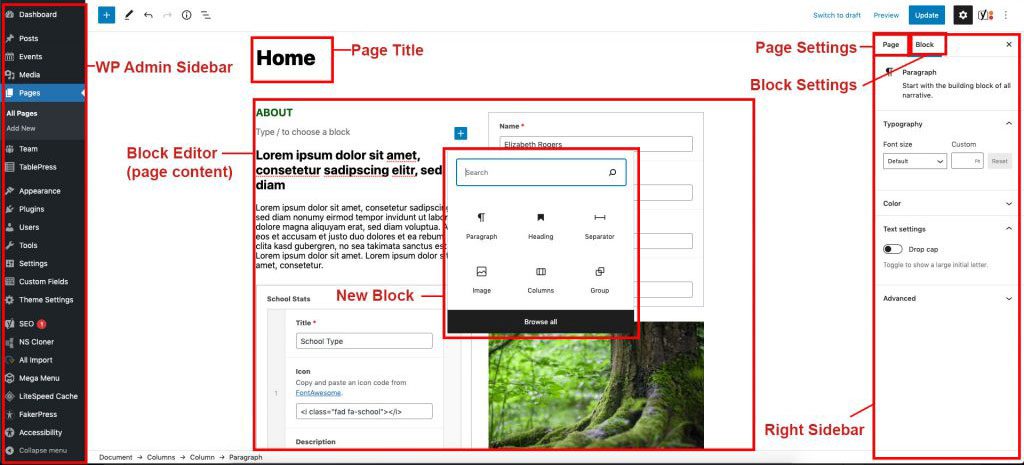
See the diagrams below for a quick outline of the pieces of a single post or page:
Note in the diagrams we have labeled some things:
- Page Title: Define your page title here.
- Block Editor/ Page Editor/ Page Content: This big area is where you lay out your page with blocks and content.
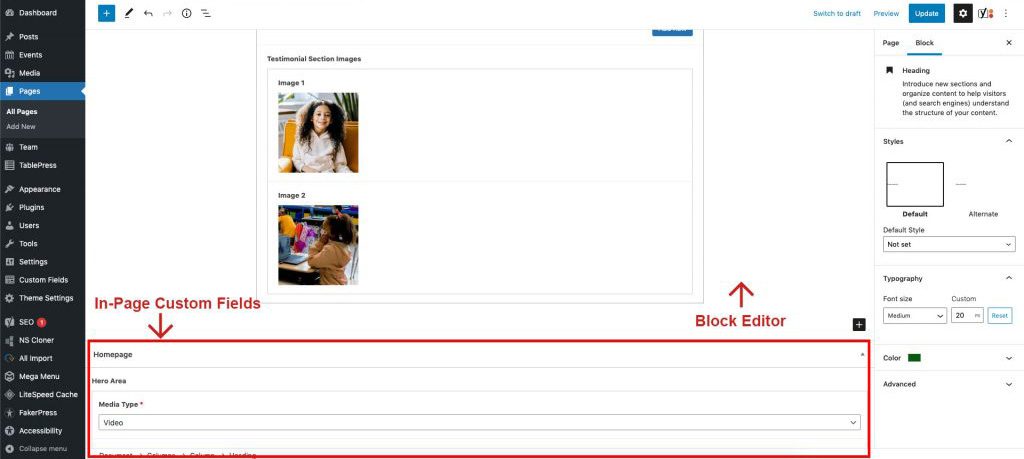
- In-Page Custom Fields: Certain pages and posts will have custom fields you can fill out to complete the layout. These fields are baked into these pages and work independently from blocks.
- Right Sidebar: This holds your Page Settings and Block Settings
- Page settings: This lets you define things in the page such as the featured image, the page slug (url), categories and more.
- Block Settings: These settings pertain to the block you have highlighted in the Block Editor.
- Left Sidebar/ Wp-admin sidebar: This is the navigation for the wordpress backend.
Tip: Since the design of some layouts can have sections flush against each other, it’s highly recommended you make use of the “Spacer” element to add space between certain sections, especially when you have sections that are not within the “Group” element. More on that later.
Important Things to Remember
Spacer Block
(Important!)
This block should be used liberally when adding content, to add vertical space. Blocks all have a small gutter between them to adhere to the mosaic design of this site, so many elements may need extra breathing room vertically. The spacer block can be adjusted height-wise by clicking and dragging the dot up or down on the block. 40px is recommended for most situations.
Column Gutter Adjustment (Block Style)
(Important!)
To add more space horizontally between columns, when selecting the columns you are working with in the block editor, in the block settings, click the block styles tab (the half circle icon). You have some predefined styles to choose from. X Wide Gap and Wide Gap should be used liberally to create more space between columns.

Featured Images
(Important!)
Featured Images set up in the page options show at the top of the page on mobile, and are hidden on desktop. If you have an image in your layout that is the same as this featured image, you should choose the option “Hide on Mobile” within the block styles if it’s a standard image block, or the “hide on Mobile” checkbox in a Title Area Blocks or Content Area Blocks image. Otherwise on mobile, you will get a duplicate image.
Theme Options
In the WP Admin Sidebar, you can click on Theme Options. This controls global elements on the site such as the company address, social links, etc. This will populate throughout the site in the applicable areas, mostly in the footer.
Smaller Break Point (Block Style)
This is also an option in the column styles that may need to be used for certain elements. If you are finding that elements within your columns do not stack well on smaller screens and tablets, you should choose this style. This will make it so the columns will stack at a larger breakpoint.
No Margin (Block Style)
You will see this style on certain blocks. This removes all margins from the block.
Custom Gutenberg
We have also customized some of the built-in Gutenberg functionality based on your site comp. Please see examples below:
Group Block with background color
Groups can contain other blocks and column blocks. Edit background and text colors in the block settings in the page editor. Colors are predefined swatches based on your branding. Backgrounds can use gradients.
Lorem ipsum dolor sit amet, consectetur adipiscing elit, sed do eiusmod tempor incididunt ut labore et dolore magna aliqua. Ut enim ad minim veniam, quis nostrud exercitation ullamco laboris nisi ut aliquip ex ea commodo consequat.
Lorem ipsum dolor sit amet, consectetur adipiscing elit, sed do eiusmod tempor incididunt ut labore et dolore magna aliqua. Ut enim ad minim veniam, quis nostrud exercitation ullamco laboris nisi ut aliquip ex ea commodo consequat.
Lorem ipsum dolor sit amet, consectetur adipiscing elit, sed do eiusmod tempor incididunt ut labore et dolore magna aliqua. Ut enim ad minim veniam, quis nostrud exercitation ullamco laboris nisi ut aliquip ex ea commodo consequat.
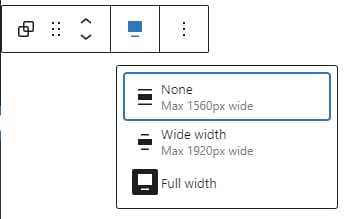
Full Width Group Block with background color
To do full width, in the options that pop up above a group when your group is selected, click the alignment options and then click “Full Width”. See screenshot below.
Groups can contain other blocks and column blocks. Edit background and text colors in the block settings in the page editor. Colors are predefined swatches based on your branding. Backgrounds can use gradients.
Lorem ipsum dolor sit amet, consectetur adipiscing elit, sed do eiusmod tempor incididunt ut labore et dolore magna aliqua. Ut enim ad minim veniam, quis nostrud exercitation ullamco laboris nisi ut aliquip ex ea commodo consequat.
Lorem ipsum dolor sit amet, consectetur adipiscing elit, sed do eiusmod tempor incididunt ut labore et dolore magna aliqua. Ut enim ad minim veniam, quis nostrud exercitation ullamco laboris nisi ut aliquip ex ea commodo consequat.
Buttons
For groups of buttons, check out the outer “Button” block options to define things such as vertical or horizontal orientation, and justification options.
Images
Images have a few crop sizes and/or aspect ratios to choose from. Resolution brings in a certain crop size of the specified photo. Aspect Ratio brings in the cropped photo based on the resolution and then re-crops it to a certain aspect ratio. It is recommended to use one or the other and leave the other option as “Original” or “Full”. Here are a few examples:
4-3 Aspect Ratio (Resolution)
16-9 Aspect Ratio (Resolution)
Tall – 9:16 (Aspect Ratio)
Bulleted List
- List item 1
- List item 2
- List item 3
- List item 4
Quote
Lorem ipsum dolor sit amet, consectetur adipiscing elit, sed do eiusmod tempor incididunt ut labore et dolore magna aliqua. Ut enim ad minim veniam, quis nostrud exercitation ullamco laboris nisi ut aliquip ex ea commodo consequat.Optional citation
Custom Post Types
Custom post types can be accessed in the WP Admin Sidebar. When you are in a post type, you can create posts within that post type. They work very similar to regular pages and posts, but with their own functionality. Each custom post type section is outlined below.
Posts
This controls the blog. Note, if you put a post in the “Alumni” category, you get extra in-page custom field options to show on that alumni – name and class year.
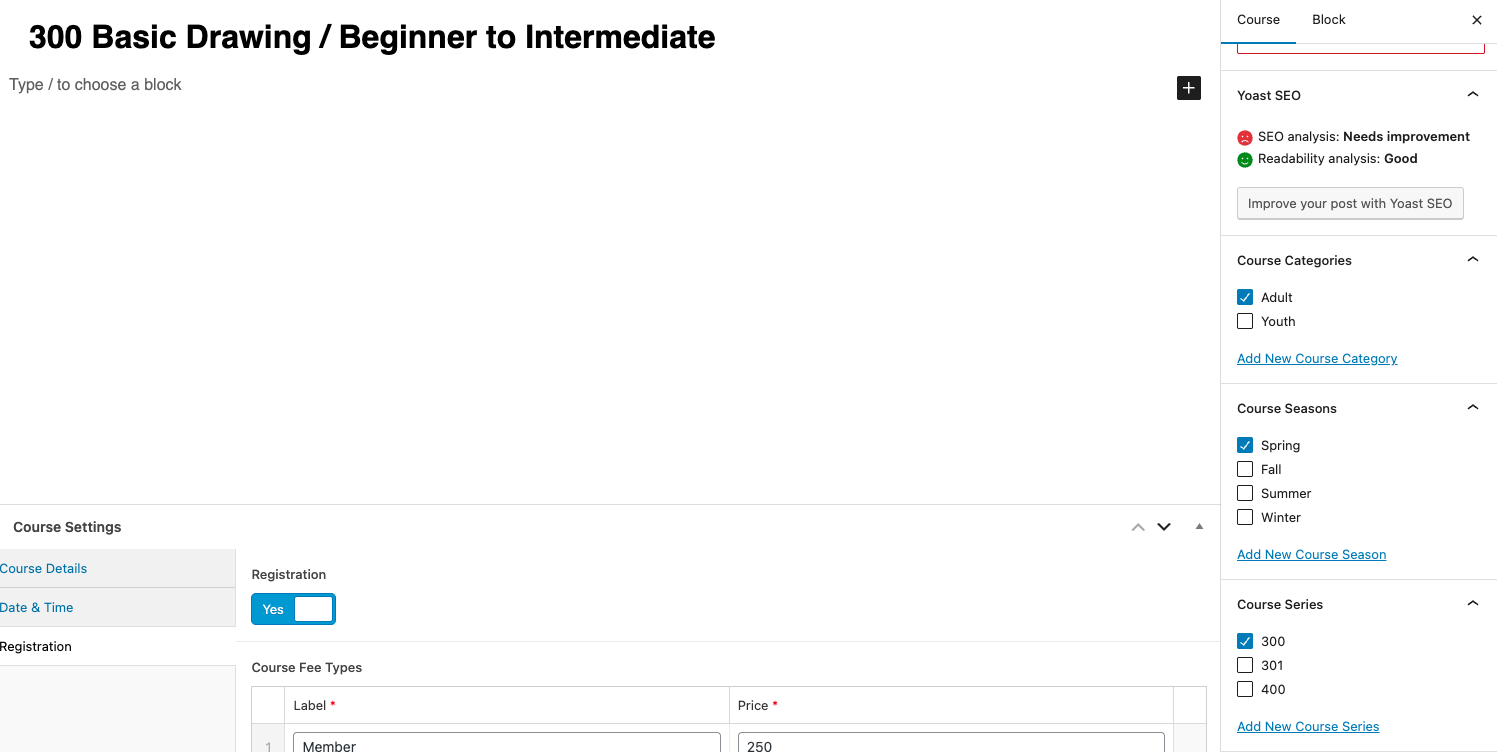
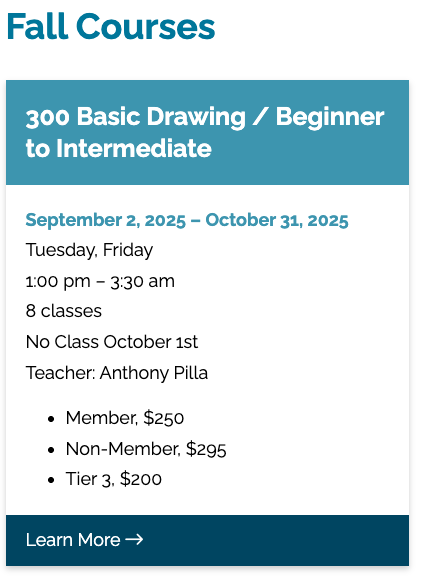
Courses
Courses play a large part in this website’s functionality. When setting up a new course, there are a number of custom fields to fill out that control the logic of the course. Most of these fields live in the Course Settings in the In-Page Custom Fields at the bottom of the page editor. These bring in course details, date & time of the course, and registration details. Course begin and end dates dictate when courses are shown on the front end of the site. After the end date is passed, that course will no longer show. The registration tab has fields that control turning registration off and on, fee types for pricing tiers, and course capacity. For course capacity you can enter in -1 to force a waitlist or leave it blank to have infinite capacity. Once a course hits it’s capacity, all registrations from there on out will go to the waitlist.
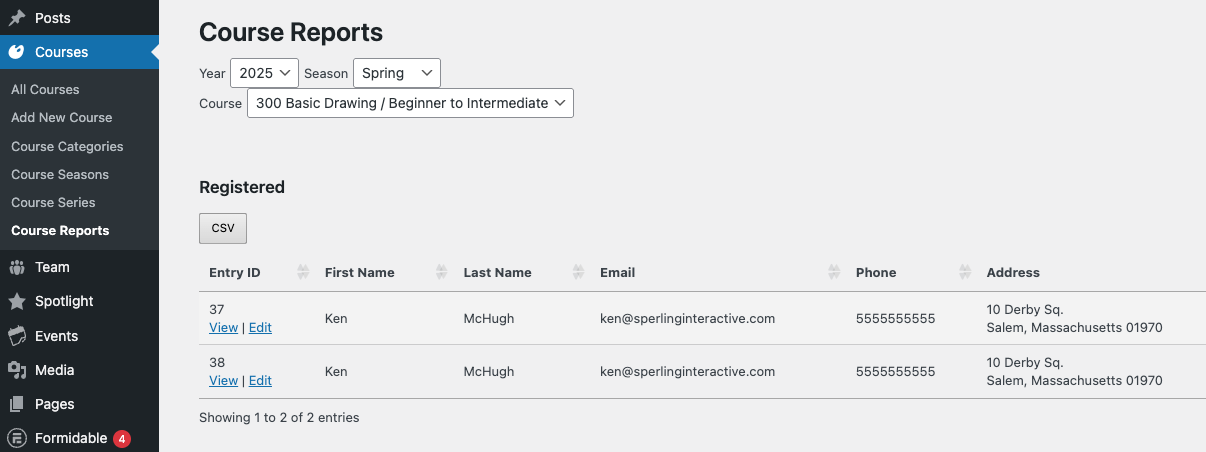
Also, in the Course settings tab in the right hand sidebar, you can define the Course Category (either Adult or Youth), Course Season, and Course Series. Course Series is set up to keep historical track of the same course over multiple semesters. For example, if you wanted to see all courses tied to Course Number 300 (in this case Basic Drawing), you would click on Course Series in the wp admin sidebar find the series (300) and click the number under the “Count” column.
Course registrations can be managed and reported on via the Course Reports tab (under Courses in the WP admin sidebar). To start, you must enter in the year of the course, then the season, then the course itself. Below, it will display all registration for that course in 3 sections: Registered, Waitlist and Unregistered.
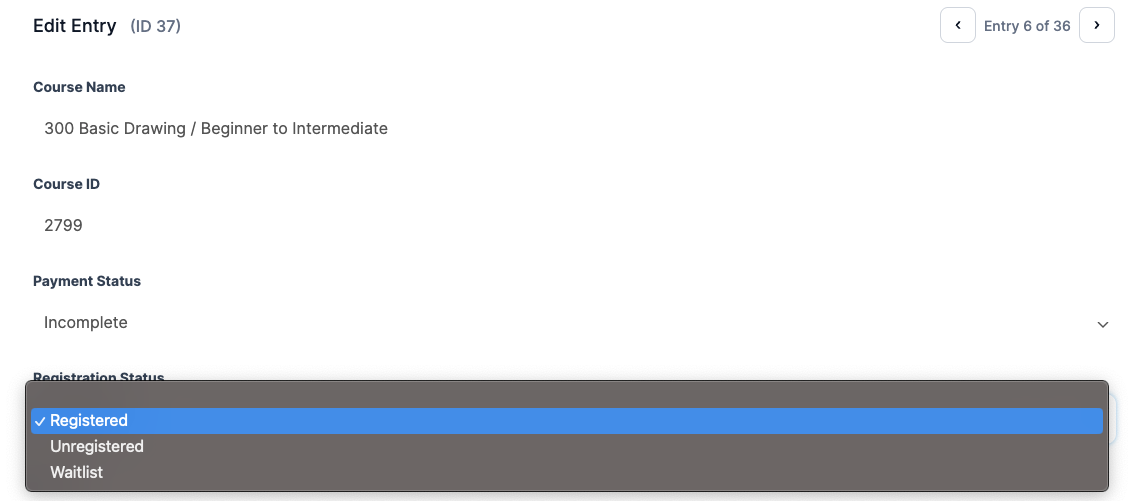
Each registration entry can be edited, so if someone drops out of a course, you can click “Edit” next to the registration, find the field for “Registration Status” and move them to “Unregistered”. You can also change the Payment Status, for example if someone on the waitlist pays and is added to a course, you could update their payment status to completed for your records. Please note that waitlist payments are a manual process.
Spotlight
Description goes here.
Team
This controls the staff directory. Each Staff member can have an image, bio and some specific options. Team members should be categorized into a team category.
Events
Events show up on the calendar. On this site, we mostly use events for Exhibitions. Exhibitions should be set up as a multi-day event (click the multi-day toggle in the date field when setting up the event). Exhibition event posts should also have a venue of one of the galleries. Exhibition Gallery pages are set up already to feed in Exhibition events based on their venue.
Custom Blocks
In addition to the standard Gutenberg blocks, we have also created several custom blocks based on the site comp.
Note: If you would like to bring up all custom blocks, when you create a new block, click “browse all” and then search for “ssac” or “sperling”. It will bring up all the blocks you see below:
Spotlight Work
This pulls in a spotlight post from the Spotlight custom post type, along with artist name, image, sizing, paypal buttons and more.

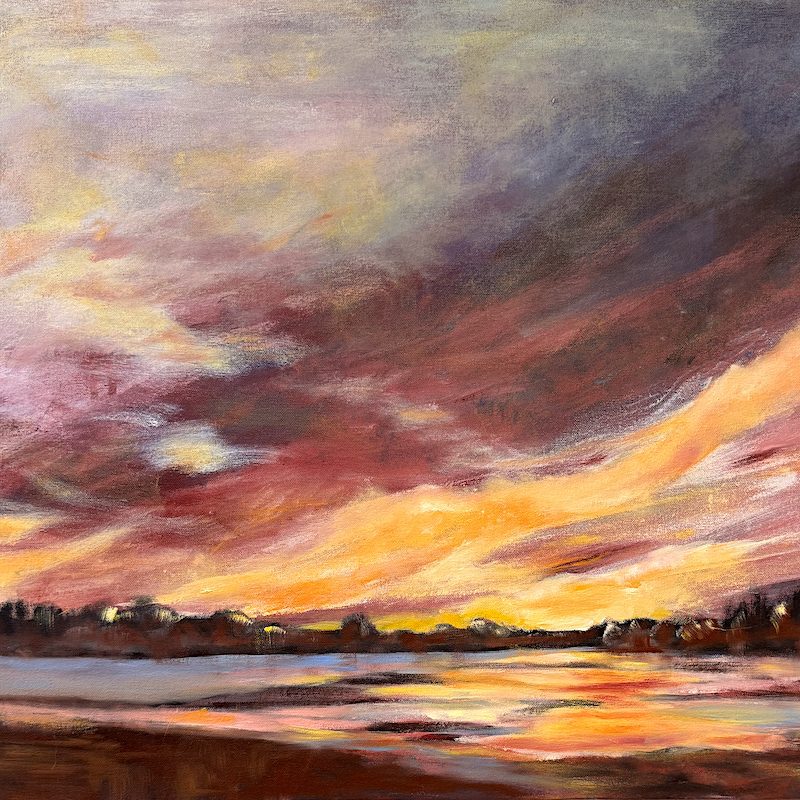
Bathing Rocks 24-83
Archival Pigment Print Photograph | 19 x 30 inches
$600 (unframed)

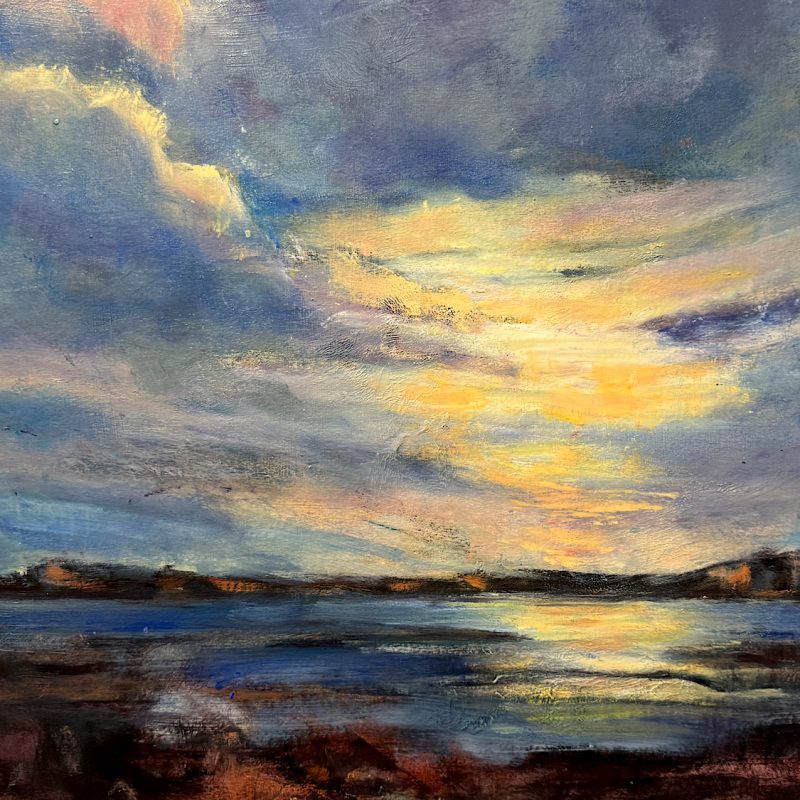
Bathing Rocks 24-38
Archival Pigment Print Photograph | 10 x 15 inches
NFS
Course List
This will bring in a list of courses from the Courses post type. What shows is based on the Course Category and the Course Season you select in the block dropdowns. Events and content will only show if there are future courses in that season. Courses that have an end date that is passed already will fall off the list.
See screenshots below:

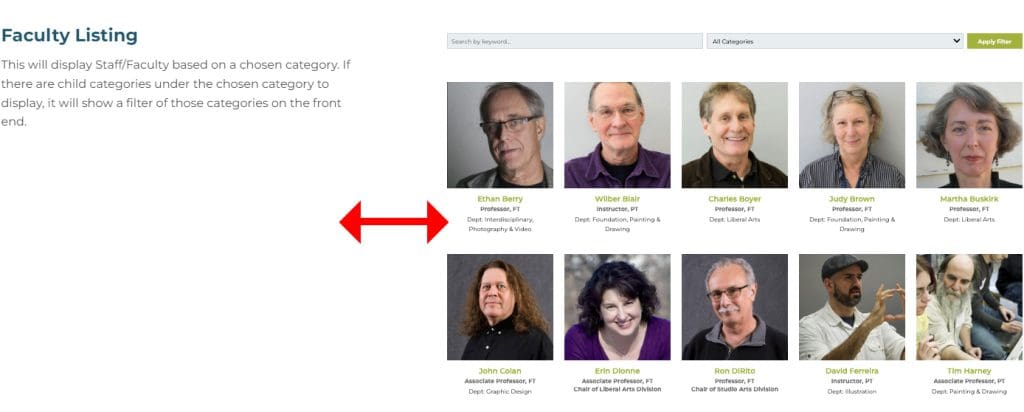
Team List
This will display a list of team members. You can choose to show by staff category (faculty or staff). Leave Team Category field blank to show all.

Cecilia Harries
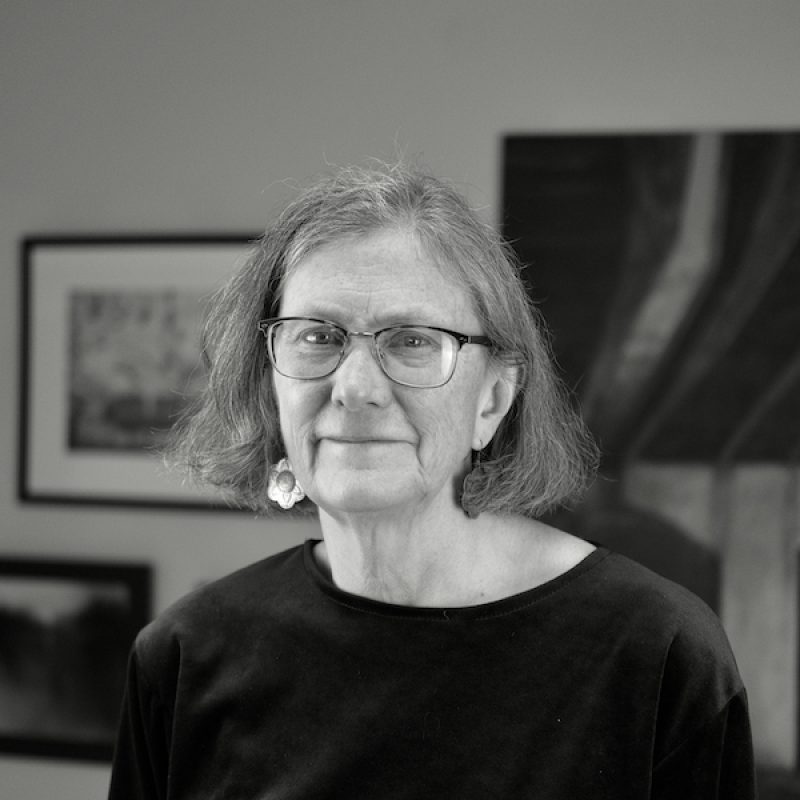
Virgina Holloway

Anthony Pilla
Sharon Smith
Liz Townsend
Google Map with Info
This will bring in a google map set to the address supplied in the Theme Settings area. You can turn contact info (also defined in the theme settings area) on or off.
119, Ripley Road, Cohasset, Massachusetts, 02025, United States
Hours
Monday – Saturday: 10AM-4PMSunday: Closed
Address
119 Ripley RoadCohasset, MA 02025
Phone
781-383-2787781-383-2964
Testimonial
Displays a stylized testimonial.
Lorem ipsum dolor sit amet, consectetur adipiscing elit, sed do eiusmod tempor incididunt ut labore et dolore magna aliqua. Ut enim ad minim veniam, quis nostrud exercitation ullamco laboris nisi ut aliquip ex ea commodo consequat. Duis aute irure dolor in reprehenderit in voluptate velit esse cillum dolore eu fugiat nulla pariatur.
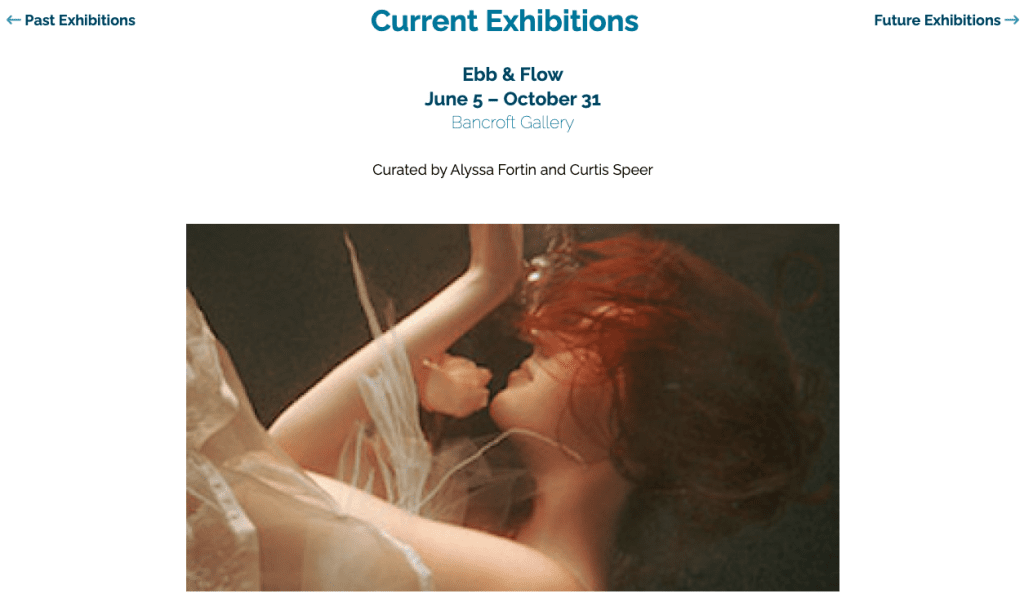
Current Exhibitions
This will show current exhibitions (exhibitions that have started but not ended yet) stacked. It also shows links to future and past exhibitions. The number of items shown can be limited by a number. If an event gallery has been defined within the post, it will show the first 3 images in the gallery. If not, it will try to show the featured image for the event. If no image options are applicable it will only show event info. See screenshot below:
Five Image Collage
Shows a collage of 5 images. Shows the middle image on mobile.


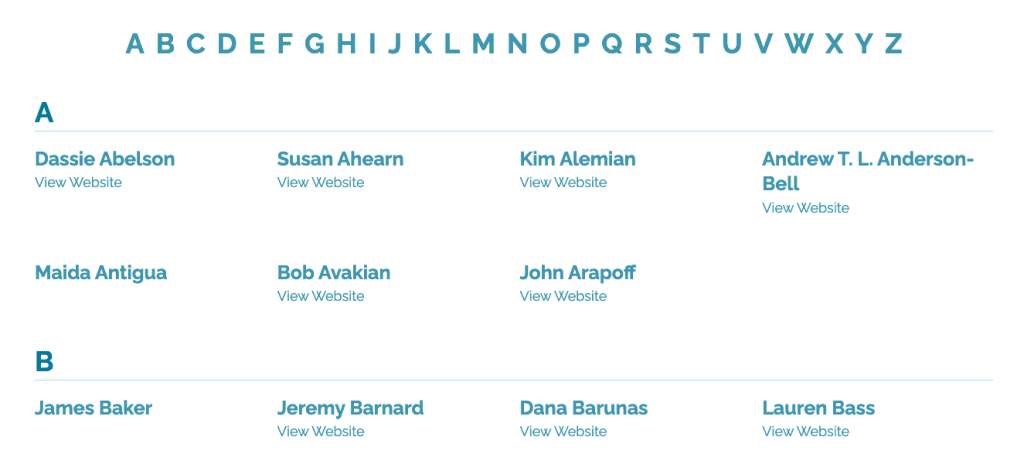
Artist List
Used for the Artist List page to organize lists or artists by letter. You can type a header and show a list of chosen artists per section. See screenshot below.
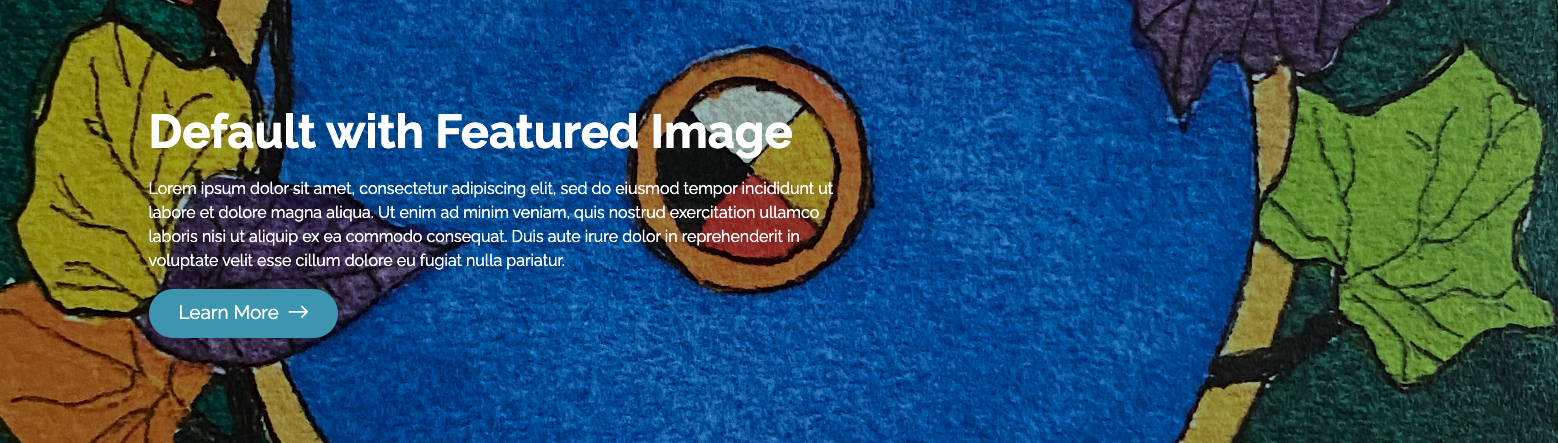
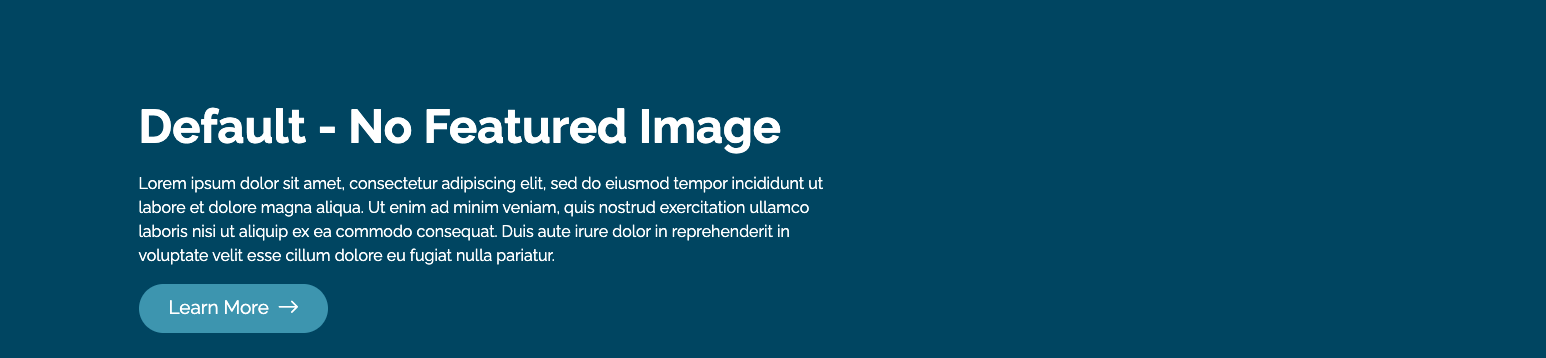
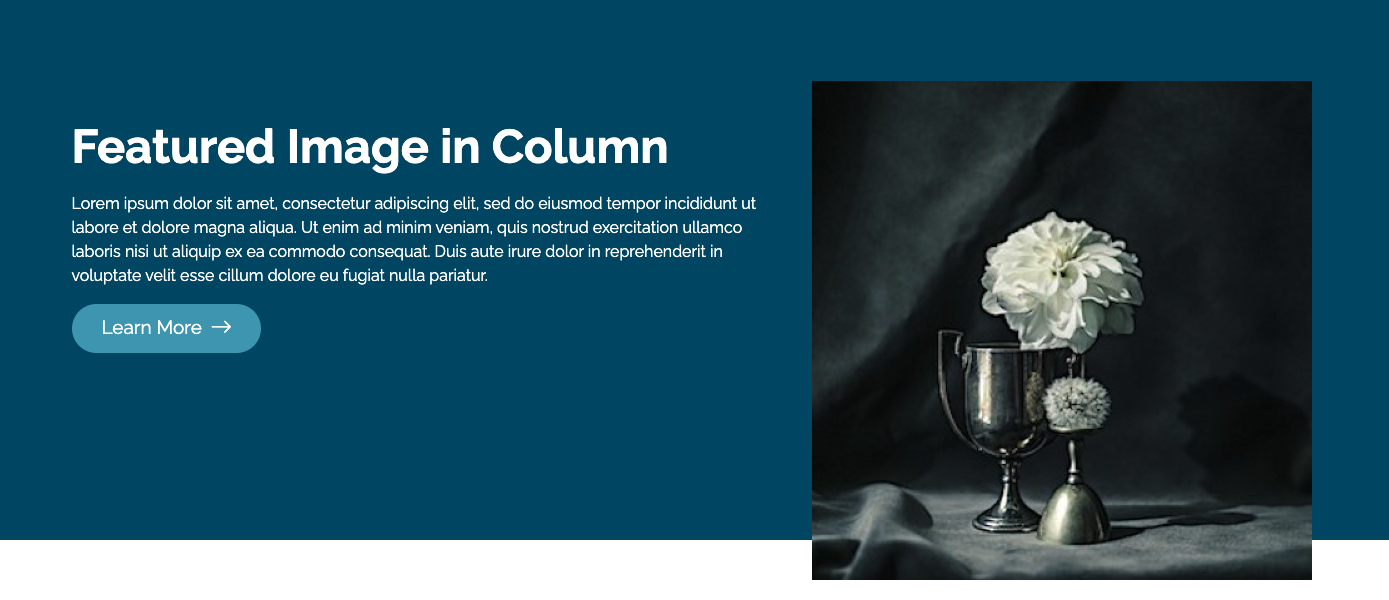
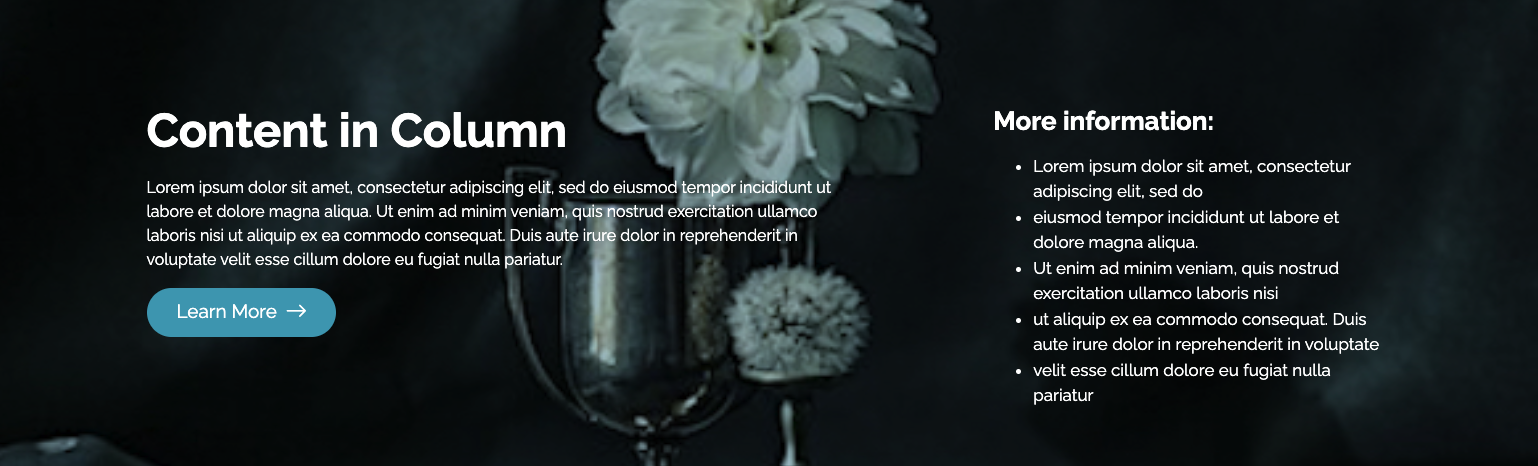
Info Section with Background Image
Shows a stylized content area with a number of customizable fields.
Lorem Ipsum
Lorem ipsum dolor sit amet, consectetur adipiscing elit, sed do eiusmod tempor incididunt ut labore et dolore magna aliqua. Ut enim ad minim veniam, quis nostrud exercitation ullamco laboris nisi ut aliquip ex ea commodo consequat. Duis aute irure dolor in reprehenderit in voluptate velit esse cillum dolore eu fugiat nulla pariatur.
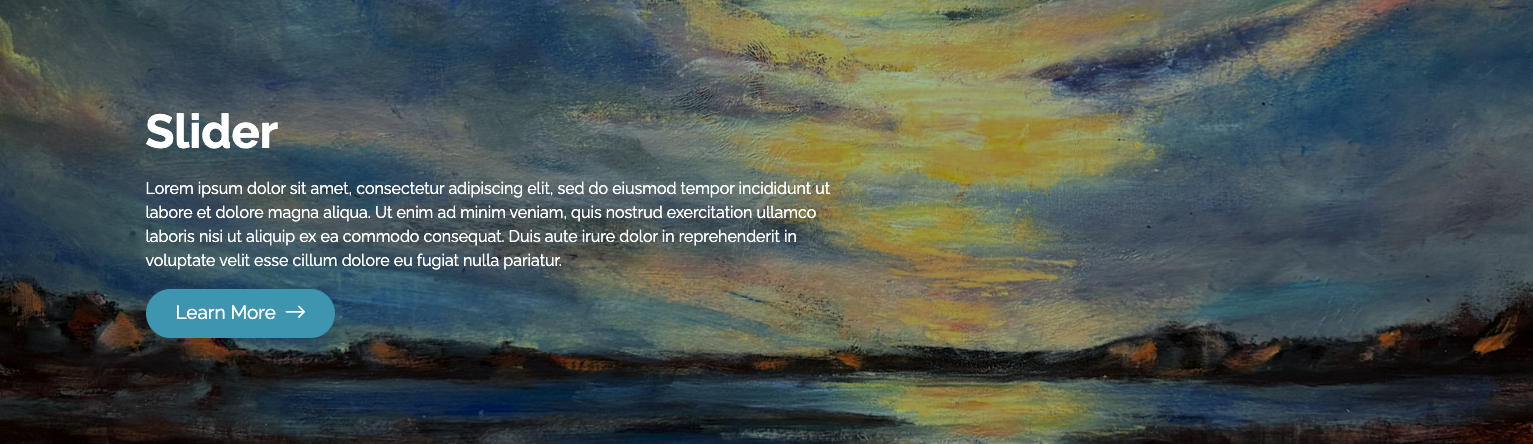
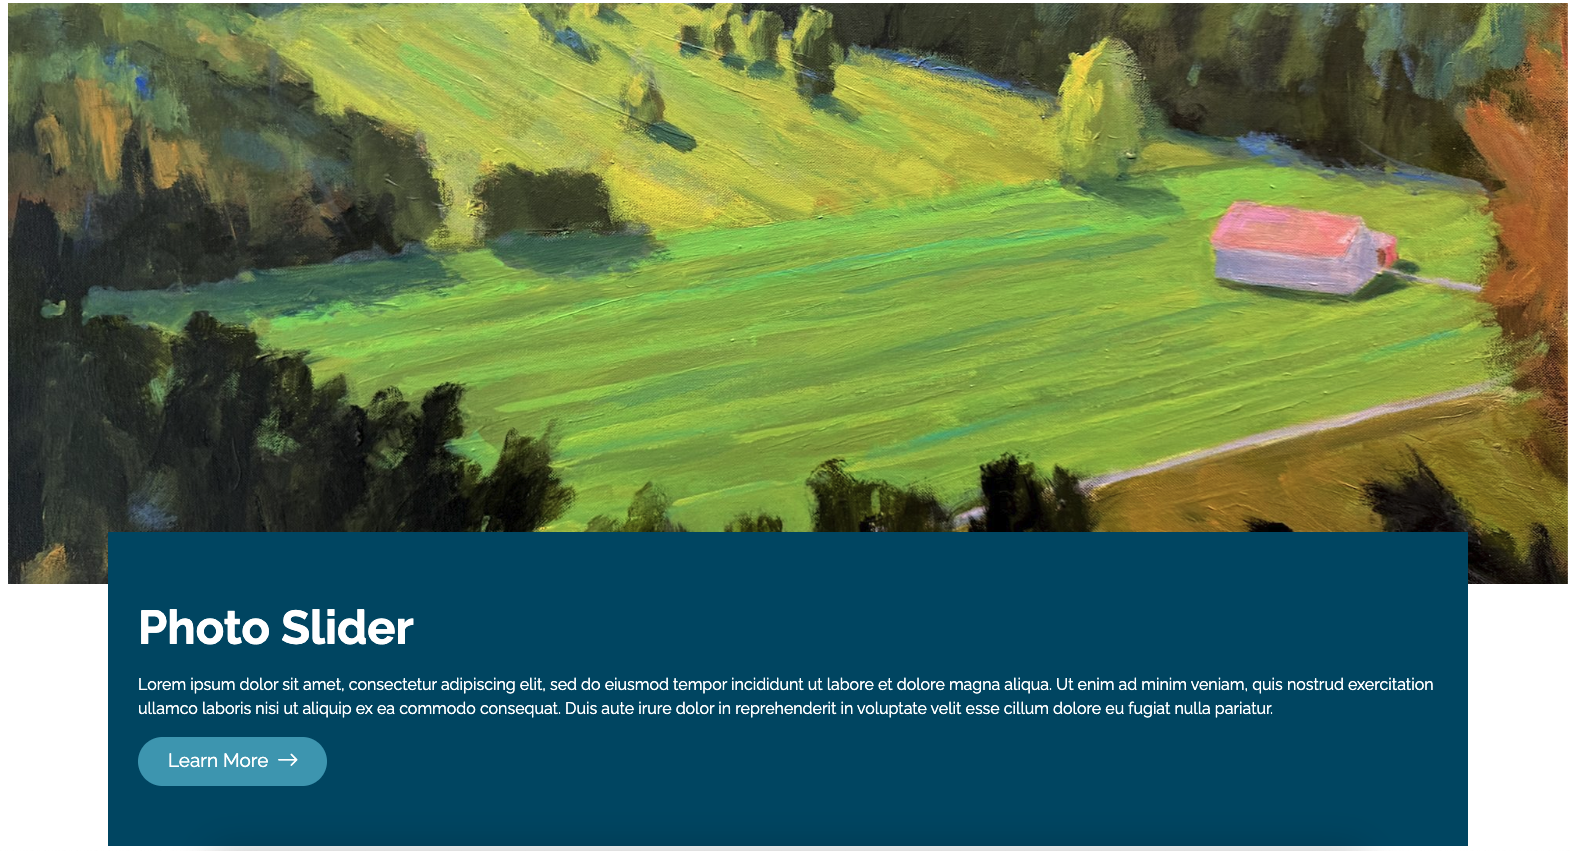
Learn MoreCustom Slider
Shows a slider of chosen images.
Event Venue
This will bring in all upcoming and current events at that venue.
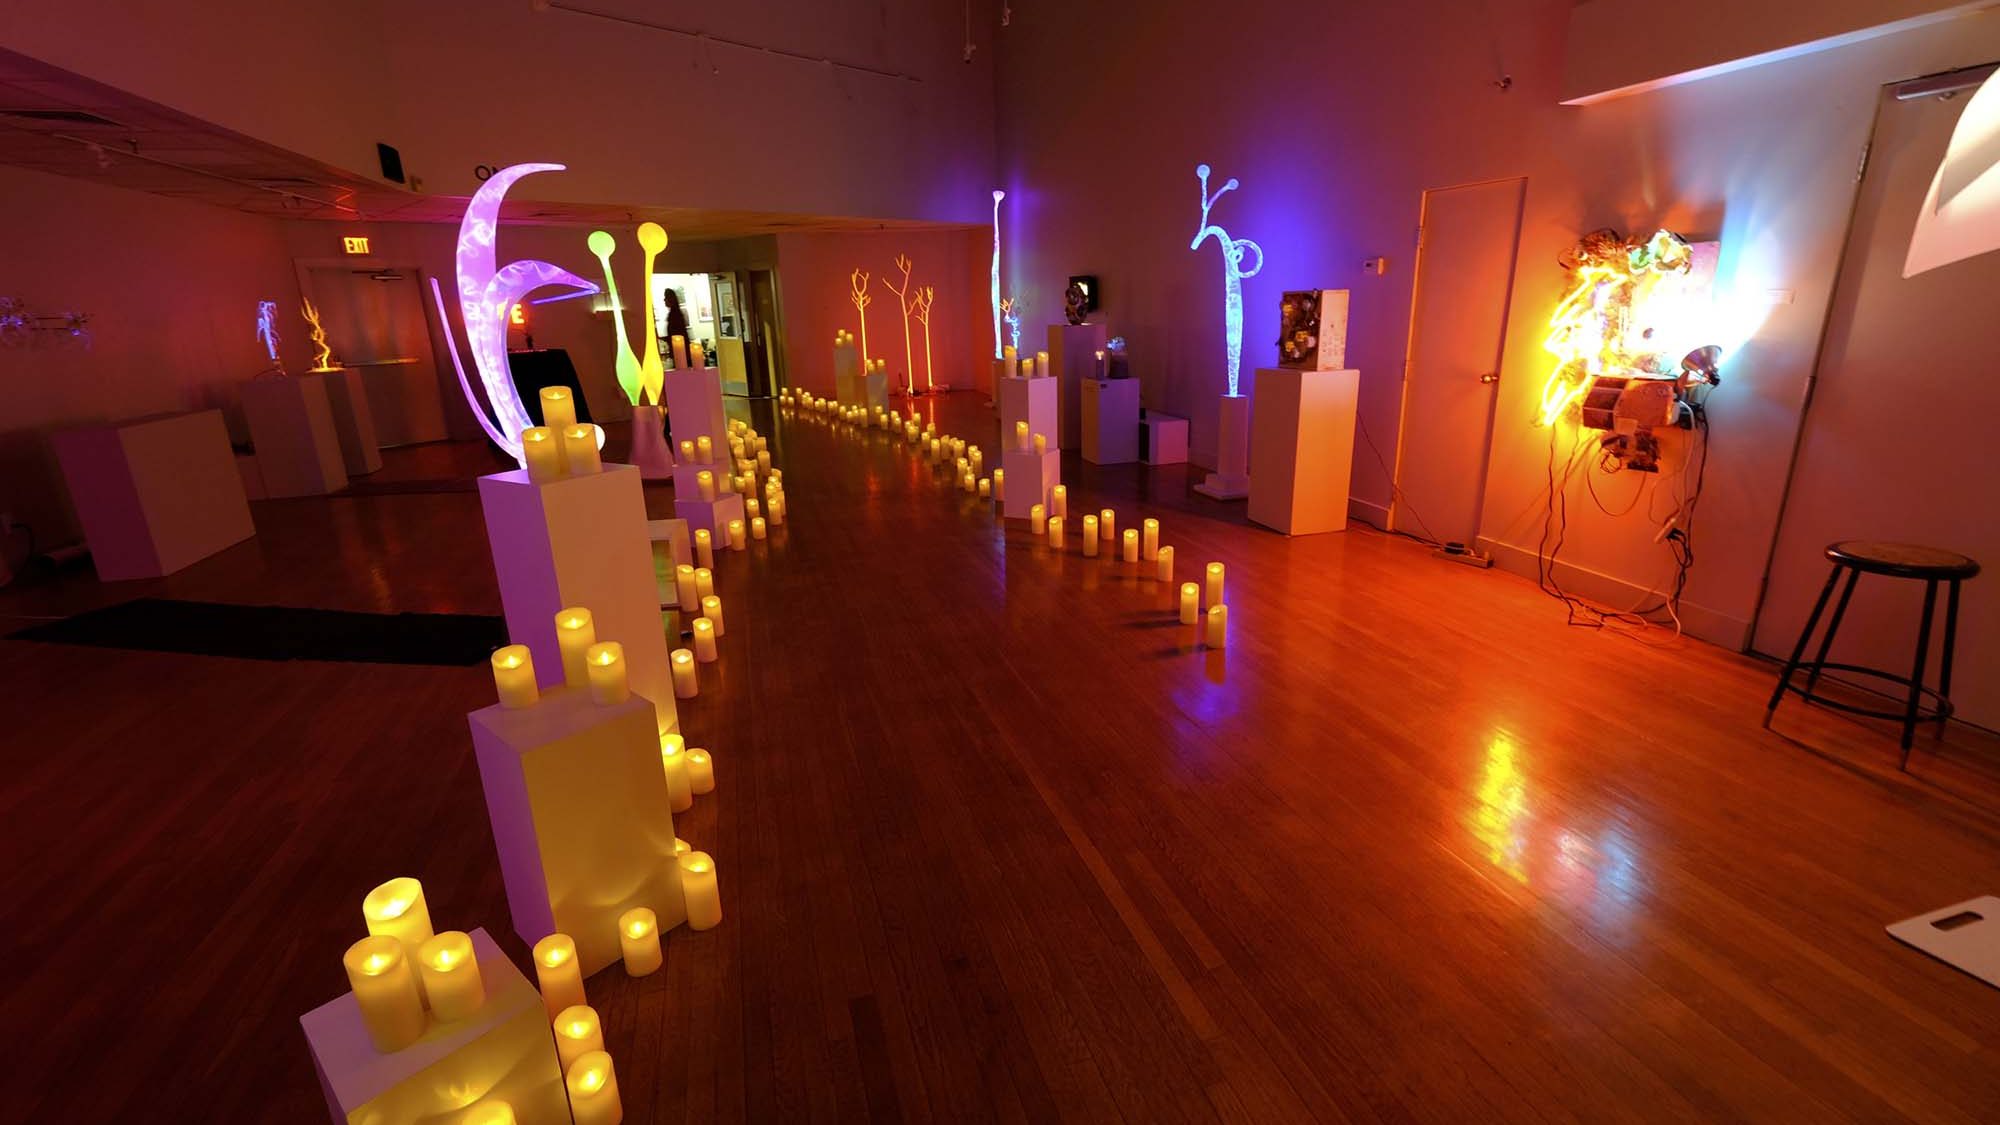
Bancroft Gallery


We Can Only Be Human Together
Featuring C.A. Stigliano, Sally B. Moore, Judy Haberl and Colin MooreJune 25 @ 6:00 pm – July 18 @ 4:00 pm
Page Title Area
There are several page title area options to choose from per page. These can be set in the In Page Custom Fields section in the bottom of the page editor. There are a number of optional custom fields to fill in as well if you want additional content in the page title area. See screenshot samples below of each type of page title area.